
Lightning Web Component Super Badge Completed! Let's talk about themes and pain points you will encounter

Hello readers, I am very excited to report that I made it through the Lightning Web Component Super Badge. I wanted to share a bit of my takeaways through the experience. First of all, the tool thats scrubbing the code to ensure that it meets all of the challenge requirements is picky! I spent a decent amount of time just fumbling through my application making sure that everything met the exact requirements that were laid out in the challenge.
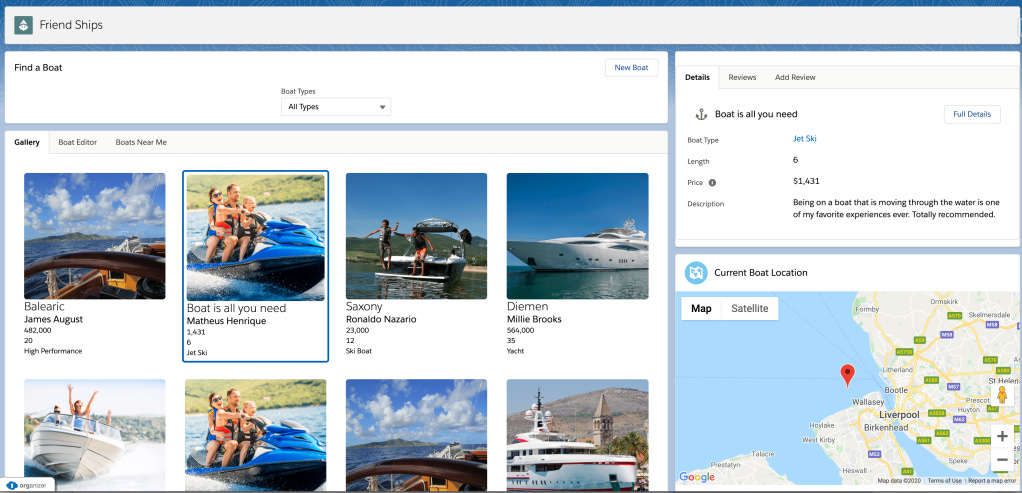
Here is a screenshot of the final project:
Here are some main themes that you will encounter and some pain points you might run into during the challenge:
Lightning Web Component Message Service
If you recall, I did blog post a while back covering different types of communication services such as Custom Events and the pubsub (publish-subscribe) architecture. The idea behind this is that you can have an action publish a message and broadcast it out to other applications. For the message service, this is called publish. On the other side, as previously mentioned, you also have other applications that are listening for the broadcasted message, or said another way, that have subscribed to that particular service. During the challenge, you will be instructed to build a service and allow your components to talk through this mechanism. When setting up the correct imports for your web component, it typically looks like this:
import { LightningElement, wire } from 'lwc';
import { publish, MessageContext } from 'lightning/messageService';
import SAMPLEMC from '@salesforce/messageChannel/SampleMessageChannel__c';

export default class PublisherComponent extends LightningElement {}
On line 2, we import the various methods from the messageService module. In this case, we are looking to publish a message from a particular action. If you were wanting to listen for a message, you would add in 'subscribe' to your imported functions. On line 3, you reference that actual metadata that you create for the message service itself. This typically looks like creating your own directory for messageChannels/SampleMessageChannel.messageChannel and adding your metadata file to it. In the case above, we would have a file that looks like this:
<?xml version="1.0" encoding="UTF-8"?>
<LightningMessageChannel xmlns="http://soap.sforce.com/2006/04/metadata">
    <description>This is a sample Lightning Message Channel</description>
    <isExposed>true</isExposed>
    <lightningMessageFields>
        <description>This is the record Id that changed</description>
        <fieldName>recordId</fieldName>
    </lightningMessageFields>
    <masterLabel>SampleMessageChannel</masterLabel>
</LightningMessageChannel>
All of this set up is great but what does this actually look like implemented?
import { LightningElement, wire } from 'lwc';
import { publish, MessageContext, unsubscribe, subscribe, APPLICATION_SCOPE } from 'lightning/messageService';
import SAMPLEMC from '@salesforce/messageChannel/SampleMessageChannel__c';

export default class PublisherComponent extends LightningElement {
    @wire(MessageContext)
    messageContext;

    // Example of publishing a message
    handleAction() {
        const message = {
            recordId: '001xx000003NGSFAA4'
        };
        publish(this.messageContext, SAMPLEMC, message);
    }

    // Example of subscribing to a message
    subscription = null;
    receivedMessage;

    subscribeMC() {
        if (this.subscription) {
            return;
        }
        this.subscription = subscribe(
            this.messageContext,
            SAMPLEMC, (message) => {
                this.handleMessage(message);
            });
    }

    unsubscribeMC() {
        unsubscribe(this.subscription);
        this.subscription = null;
    }
}
Let's break this code apart. On line 7, we are using the @wire property for something called 'MessageContext' and storing the result of into a variable...why? The MessageContext object simply provides information about the Lightning Web Component that are about the utilize this message service functionality. This will be used to pass the context of your message to the subscribe function so that it knows what to subscribe to.
Okay...but what about APPLICATION_SCOPE? What' that?

Defining the scope of a message service allows you to limit the scope of your message only to the active area you see above, or set the scope to the entire application. Depending on your needs, you might be able to work with the default scoping.
Now that we understand messageContext and the scope, it's time to actually subscribe our application to this message service. On line 25, we invoke the subscribe call which takes 3 arguments: our message context, our instance of the message channel we are subscribing to that was imported above, and a callback function that relays our message to us. From here, we can modularize this further by creating another function that handles the broadcast, or we can simply handle the logic directly in the callback.
Importing Custom Labels into Lightning Web Components
Let's say that I create a label called "This Awesome Label" (This_Awesome_Label) and I want to reference it from my Lightning Web Component. First, we need to import it and here is the general structure:
import labelName from '@salesforce/label/label-reference';labelName refers to the naming that will be referenced from your component
label-reference refers to the actual label name. If your org has a namespace, then it would be Namespace.label_name
Here is what this would actually look like in our example:
import awesomeLabel from '@salesforce/label/c.This_Awesome_Label'

export default class PublisherComponent extends LightningElement {
    label = {
        awesomeLabelReference: awesomeLabel
    }
}
Allow admins to configure your Lightning Web Component
When creating applications, a discussion is often needed in answering, "how configurable can we make this to avoid maintenance issues down the road?". I am a huge fan of this because it also empowers admins to be able to make safe, production level changes without the need to promote more code and configuration changes up the stack which increases your go-to-market time for feature enhancements. But how is this actually done in a web component?
We know that in our aura components, we can leverage the design attribute functionality to provide configuration but it looks a little different and is more intuitive for LWC.
Let's say that I want to give an admin the ability to change the title of a lightning-card html tag at a moments notice for whatever business reason. The first thing I would do is create a simple component that looks like this:
<!-- HTML -->
<template>
    <lighting-card title={changingTitle}>

    </lightning-card>
</template>
import { LightningElement, wire } from 'lwc';
export default class LightningCardTitleChange extends LightningElement {
@api
changingTitle
}<?xml version="1.0" encoding="UTF-8"?>
<LightningComponentBundle xmlns="http://soap.sforce.com/2006/04/metadata">
<apiVersion>48.0</apiVersion>
<isExposed>true</isExposed>
</LightningComponentBundle>Pretty standard component, right? We just have a lightning card thats dynamically referencing a title attribute from the JavaScript that is publicly exposed with the api decorator. But now what? If we want to get this into the hands of the admin, were actually going to need to head to the js.meta.xml file to accomplish this. I know, I know...the file we almost never care about aside from marking that exposed tag to true when we create it. Let's also pretend that this component will also be used on a record page for the Account object. Here is what this would look like prepped for admin configuration:
<?xml version="1.0" encoding="UTF-8"?>
<LightningComponentBundle xmlns="http://soap.sforce.com/2006/04/metadata">
    <apiVersion>48.0</apiVersion>
    <isExposed>true</isExposed>
    <targets>
        <target>lightning__RecordPage</target>
    </targets>
    <targetConfigs>
        <targetConfig targets="lightning__RecordPage">
            <property label="Enter the name of the card title" name="changingTitle" type="String"/>
            <objects>
                <object>Account</object>
            </objects>
        </targetConfig>
    </targetConfigs>
</LightningComponentBundle>
With some minor tweaking of the js-meta.xml file, we now have the ability to expose configuration to the component, making it more dynamic and scalable.
On line 6, we are simply letting the component know that a record page can use this component.
On line 9, we are now declaring that we have configuration wanted on a record page with the properties and objects that we are about to define below.
On line 10, we are using the name of the property tag to match the @api decorated variable in our JavaScript file to receive the dynamic name.
On line 12, we are designating the compatible objects that this component could be used with upon dropping it onto any record page of our choosing.
There are many other components to this that I linked above but the point is to illustrate that this provides a whole other world of application development that we can utilize in a big way that you will most definitely see on the super badge.
Here is a list of other items that you will encounter on your super badge journey:
Use Salesforce Lightning Design System (SLDS) in functional Lightning web components.
Convert Visualforce pages into a solution using Lightning Web Components.
Surface Lightning web components in Lightning App Builder, Lightning Experience, and a Lightning application.
Empower Admins to configure your custom components.
Create and invoke Apex methods to read data from custom objects.
Use component events and public methods to enable communication between tightly coupled components.
Enable communication between loosely coupled components.
Use Lightning Data Service to read and write custom object data.
Customize and use external JavaScript in a Lightning web component.
Troubleshoot your JavaScript code.
Describe how to test Lightning Web Components.
Import, export, and extend modules.
I'm very excited to....publish...this blog for my readers.
Please let me know if you have any questions about the super badge or require any assistance. I am always happy to hop on a call and help anyone out. Good luck and happy coding!