
Budgie iOS: Let's walk through the journey of sending push notifications from Salesforce to an iOS device through Apple's APNs - Part 1. We will cover generating signed JWT tokens in Apex, attempting to use an HttpRequest, a working integration using curl

Hello readers! It's been a while since my last post. Let me catch you up on what has been going on in my life and why I have been away from the blog for a while. Last December, my wife and I found out that we were expecting our first child! As the pregnancy got more intense and demanding in the middle of our super heated Austin summer, I decided to take a step away from the blog and use the extra time to focus on helping my wife get through the last part of her pregnancy and prepare as much as possible for the the arrival of our son. We are thrilled to have him as part of our lives and are so excited to grow together as a family.
Okay, lets get into it! What is the point of this post? Well, part of the work that I have been doing on the Budgie iOS family budgeting app is to allow us to be informed about our spending without physically going to the app. This would allow us to be alerted on the fly about high spending, how much we spent yesterday, how we are trending towards the monthly budget and any helpful insights that we could drive action from. Push notifications sent from Salesforce to the Budgie app would be a great solution for this and I wanted to learn more about how I could integrate my Salesforce backend with a custom iOS mobile app.
Asking Permission to Use Notifications
Our first step is to confirm that the user who has downloaded the app actually wants to receive notifications.

Swift has built in functions to handle this scenario.
//AppDelegate.swift
import UserNotifications

func registerForPushNotifications() {
      //1
        UNUserNotificationCenter.current()
          .requestAuthorization(
            options: [.alert, .sound, .badge]) { [weak self] granted, _ in
            print("Permission granted: \(granted)")
            guard granted else { return }
            self?.getNotificationSettings()
          }
    }

    func application(_ application: UIApplication, didFinishLaunchingWithOptions launchOptions: [UIApplication.LaunchOptionsKey: Any]?) -> Bool {
        // Override point for customization after application launch.
        //Thread.sleep(forTimeInterval: 3.0)
        print("--- Did finish launching with options is called ---")
        registerForPushNotifications()
        return true
    }

    func getNotificationSettings() {
        UNUserNotificationCenter.current().getNotificationSettings { settings in
            print("Notification settings: \(settings)")
            guard settings.authorizationStatus == .authorized else { return }
            DispatchQueue.main.async {
                UIApplication.shared.registerForRemoteNotifications()

            }
        }
    }
Swift, like many other platforms, contain lifecycle hooks that we can use for different parts of the application lifecycle and override to meet our needs. The hook didFinishLaunchingWithOptions allows us to override app launch behavior and try to register for push notifications anytime the app is launched.
We call registerPushForNotifications() which prompts the app alert you see above, giving the user the option to allow or deny notifications from the app. This will save the users authorization status as a settings variable and reference it when we eventually call getNotificationSettings() which will check for the authorizationStatus of the user before registering them for remote notifications. UIApplication.shared.registerForRemoteNotifications() will register the user for notifications.
This leads us to one more lifecycle hook that swift supports:
func application(
      _ application: UIApplication,
      didRegisterForRemoteNotificationsWithDeviceToken deviceToken: Data
    ) {
      let tokenParts = deviceToken.map { data in String(format: "%02.2hhx", data) }
      let token = tokenParts.joined()
      print("Device Token: \(token)")
    }
This is called when a user does register for remote notifications. We can use this swift function to retrieve our device token and then eventually establish a suitable architecture to send this device token to our Salesforce backend (we will get to this a bit later) which will eventually use it for POST related calls out to the APNs and send notifications to our users iOS devices through the app. Our next section will cover that.
Sending Notification Requests to APNs
When you have a notification to send to a user, your provider must construct a POST request and send it to Apple Push Notification service (APNs). Your request must include the following information:
The JSON payload that you want to send
The device token for the user’s device
Request-header fields specifying how to deliver the notification
For token-based authentication, your provider server’s current authentication token
Upon receiving your server’s POST request, APNs validates the request using either the provided authentication token or your server’s certificate. If validation succeeds, APNs uses the provided device token to identify the user’s device. It then tries to send your JSON payload to that device.
The above was directly referenced from Apples documentation on the Push Notification Service. You can read more about it here.
Here is one of the most important things that we will cover and that will drive a lot of our architectural decision making: To establish a connection between your provider server and a development or production APNs Apple server, you must use HTTP/2 and TLS1.2 or later.
We will revisit this section in greater depth later on but its important to have this nugget of context. Before we make any calls out to the APNs server to send notifications to our device using the payload mentioned above, we must establish an authenticated connection to it. We will cover that in the next section.
Establish a Connection to APNs
What do I mean by establishing a connection? Well, in order to send a request out to an APNs server to issue a notification to a device, we must first let apple know that we are who we say we are. Apple's APNs server accepts two forms of authentication at the time I am writing this blog: Token-Based and Certificate-Based. For this blog, we will be focused primarily on Token-Based authentication, however you can read about how one can obtain a certificate through your Apple developer account and establish a connection.
Establishing a Token-Based connection with APNs
It's important to mention that before doing any of this, you must be registered as an Apple Developer before you can enable push notifications for your app. After this, you can navigate to your targets in XCode and enable Push Notifications under Signing and Capabilities.

After we do this, we can navigate over to our Apple Developer account to add a new service key for our application

As you can see above, this allows us to give a name to our key and also select the Apple Push Notifications service as a related capability to this key so that we can leverage the API once we establish the connection. Once this is saved, the new key created will issue you a 10 digit Key Id that we will use later when generating our token. Another item this Service Key gives us is a .p8 file containing a private key that we can only download once. Be very careful with who you share this key with and if you feel that it has been compromised, you can always revoke it and generate a new one.
Create and Encrypt your JSON token
The token that you include with your notification requests uses the JSON Web Token (JWT) specification. The token itself contains four key-value pairs.
KeyDescriptionalgThe encryption algorithm you used to encrypt the token. APNs supports only the ES256 algorithm, so set the value of this key to ES256.kidThe 10-character Key ID you obtained from your developer account;issThe issuer key, the value for which is the 10-character Team ID you use for developing your company’s apps. Obtain this value from your developer account.iatThe “issued at” time, whose value indicates the time at which this JSON token was generated. Specify the value as the number of seconds since Epoch, in UTC. The value must be no more than one hour from the current time.
When creating the POST request for a notification, include your encrypted token in the authorization header of your request. The token is in Base64URL-encoded JWT format, and is specified as bearer <token data>
Information above copied from official Apple documentation. Please click here to review more.
So now that we have all of the key-value pairs that we need to successfully generate a Base64URL-encoded JWT formatted token, lets build an Apex method in Salesforce to handle this.
public static String generateJWTToken(String kid, String iss, String alg, String key) {

    String jwt = '';
    Blob testBlob = EncodingUtil.base64Decode(key);
    String jwtHeader = '{"kid":"' + kid + '","alg":"' + alg + '"}';
    String encodedHeader = base64URLencode(Blob.valueOf(jwtHeader));

    Long rightNow = (dateTime.now().getTime()/1000)+1;
    String jwtPayload = '{"iss":"' + iss + '","iat":"' + String.valueOf(rightNow) + '"}';
    String encodedPayload = base64URLencode(Blob.valueOf(jwtPayload));
    jwt = encodedHeader + '.' + encodedPayload;

    Blob signature = Crypto.sign('ECDSA-SHA256',Blob.valueof(jwt),testBlob);
    jwt += '.' + base64URLencode(signature);
    return jwt;
}

public static String base64URLencode(Blob input){
    String output = encodingUtil.base64Encode(input);
    output = output.replace('+', '-');
    output = output.replace('/', '_');
    while ( output.endsWith('=')){
        output = output.subString(0,output.length()-1);
    }
    return output;
}
What is this code doing? Well, we are constructing our JWT headers and payload, base64URLEncoding them (as mentioned above) and then using our .p8 private key and the Crypto class to sign the token and generate the signature. We can then concatenate our signature with the original jwt string. The result of this function being called with all of the correct parameters passed in looks like this:
eyAia2lkIjogIjhZTDNHM1JSWDciIH0.eyAiaXNzIjogIkM4Nk5WOUpYM0QiLCAiaWF0I jogIjE0NTkxNDM1ODA2NTAiIH0.MEYCIQDzqyahmH1rz1s-LFNkylXEa2lZ_aOCX4daxxTZkVEGzwIhALvkClnx5m5eAT6 Lxw7LZtEQcH6JENhJTMArwLf3sXwi
Hooray! We now have our generated access token that we can use to perform callouts out to our APNs. So, the only thing left to do is build our HttpRequest in Apex and sail off into the sunset with a cool new push notification feature for our app right?!?!
You only wish it were that simple! First, lets take a look at what is required within our payload for the push notifications.
Header fieldDescription:method(Required) The value POST.:path(Required) The path to the device token. The value of this header is /3/device/<device_token>, where <device_token> is the hexadecimal bytes that identify the user’s device. Your app receives the bytes for this device token when registering for remote notifications.authorization(Required for token-based authentication) The value of this header is bearer <provider_token>, where <provider_token> is the encrypted token that authorizes you to send notifications for the specified topic. APNs ignores this header if you use certificate-based authentication. apns-push-type(Required for watchOS 6 and later; recommended for macOS, iOS, tvOS, and iPadOS) The value of this header must accurately reflect the contents of your notification’s payload. If there’s a mismatch, or if the header is missing on required systems, APNs may return an error, delay the delivery of the notification, or drop it altogether.apns-topicThe topic for the notification. In general, the topic is your app’s bundle ID/app ID. It can have a suffix based on the type of push notification. If you’re using a certificate that supports PushKit VoIP or watchOS complication notifications, you must include this header with bundle ID of you app and if applicable, the proper suffix. If you’re using token-based authentication with APNs, you must include this header with the correct bundle ID and suffix combination.
Now that we have our known parameters for sending a request to APNs, lets take a look at the Apex method that is performing the request:
public static void performAPNsCallout(String token, String deviceToken, String apnsTopic) {

    HttpRequest request = new HttpRequest();
    request.setEndpoint('https://api.sandbox.push.apple.com/3/device/' + deviceToken);
    request.setMethod('POST');
    request.setBody('{"aps":{"alert":"hello, this is a cool message!"}}');
    request.setHeader('Authorization', 'bearer ' + token);
    request.setHeader('apns-topic', apnsTopic);

    Http http = new Http();
    HTTPResponse res = http.send(request);
}
When this block of code runs, I kept getting this error:

As I beat my head over a wall trying to figure out what I was doing, I re-read the Apple documentation and stumbled upon a very interesting sentence that will now be familiar to you.
To establish a connection between your provider server and a development or production APNs Apple server, you must use HTTP/2 and TLS1.2 or later.
Hmm....
So I started digging through Salesforce protocol documentation to make sure that it does indeed support the Http/2 protocol. Then I found it:
Salesforce does not currently support the HTTP/2 protocol.
I thought that I was dead in the water but I at least wanted to make sure that the token I was generating actually worked and I could indeed send a notification to my device using HTTP/2 protocol.
--- Curl has entered the chat ---
I started reading through some of Apple's documentation and stumbled upon an article titled Send Push Notifications using Command Line Tools. After reading through it, I felt like I had enough information to generate a request through the command line using curl to at least test that the push notification would work to my device. Sure enough, when I opened up my terminal and ran a quick curl --version, it revealed that it does indeed support the http2 protocol. Below is an example of what that command looks like:
% curl -v -d '{"aps":{"alert":"hello, this is a cool message!"}}'
-H "apns-topic: sampleTopic"
-H "authorization: bearer --token--"
--http2 https://api.sandbox.push.apple.com/3/device/--deviceToken--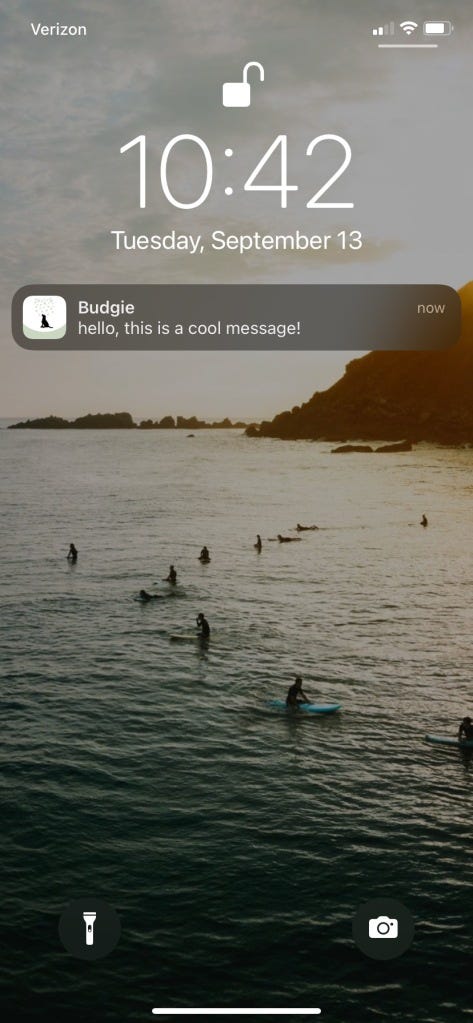
It actually worked! I was so excited when this came through my phone, you have no idea! However, after the excitement, my interest peaked again. If Salesforce doesnt support the http2 protocol but does support a MobileSDK for custom iOS app development, how does Salesforce support the ability to send push notifications to devices from the platform.

Connected App Man is here to save the day!!
Join me next time in the second part to this series where we will talk about how to use a connected app to send push notifications to an iOS device, utilizing the MobilePushServiceDevice and writing some Batch Apex to send regularly scheduled push notifications to the Budgie app to notify us about our spending. For everyone who made it this far, thanks so much for your interest and reading. Feel free to leave a comment below!
Happy Coding!